

How to Use the Cisco Aironet 1242?
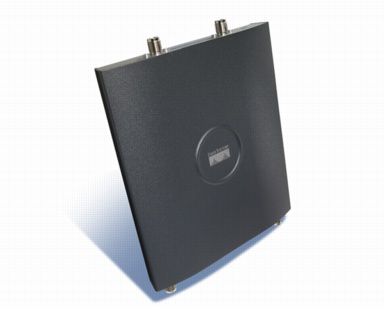
The Cisco Aironet 1242 is a wireless access point created by Cisco. The main difference between this device and most other Cisco products is that the Aironet1242 provides support for mesh wireless networks. Mesh networks extend wireless network range by relaying information from an access point to other access points, instead of requiring that each access point have its own wired backbone connection.
Ethernet cable you first need
Instructions to Use the Cisco Aironet 1242
1. Power on the 1242.
2. Connect your network switch to the "Ethernet" port on the back of the 1242, using the Ethernet cable.
3. Log in to any computer connected to the same network switch. Click "Start," then "Programs." Select "Accessories" and "Telnet." A new Telnet window will come up.
4. Click "Connect," then "Remote system" on the Telnet window. Type the Internet Protocol (IP) of the 1242; the default is 192.168.1.1. Click "Connect."
5. Type the following commands into the Telnet session to configure an IP address for the 1242:
configure terminal
interface bvi1
IP address 192.168.40.9 255.255.0.0
Replace "192.168.40.9" and "255.255.0.0" with the IP address and network mask, respectively, assigned to the 1242 by your network's administrator. Press "Enter" after each command.
6. Launch a Web browser on the computer and navigate to the Web address "http://192.168.40.9" (replace the IP address with the one assigned in Step 5). Type "Cisco" as the user name and "Cisco" as the password, then press "Enter." The 1242's configuration utility will come up on the browser.
7. Click "Express Set-up." Type a host name of your choice if the default value is already being used by another 1242 on the same network. Select "Enable" for the "Aironet Extensions" for both the 802.11a and the 802.11g radios. Click "Apply." At that point, the 1242 will provide a wireless network ready for client computers to join.
More Related: Password Recovery on Cisco 1242 Access Point


/image%2F1490247%2F20190327%2Fob_8eebea_networking-for-digital-intro.png)
/image%2F1490247%2F20190214%2Fob_219b31_cisco-900-series.jpg)
/image%2F1490247%2F20181120%2Fob_1d920f_isr1100series.png)
/https%3A%2F%2Fassets.over-blog.com%2Ft%2Fcedistic%2Fcamera.png)
